
How to Create a Free WordPress Staging Site Before Making Changes
Quick scene. You hit Update on a plugin, refresh the page, and your homepage is just… white. Nothing. Customers are looking at it right now.
That’s the moment a staging site saves you. It’s a private copy of your website where you can try risky things, and if they go wrong, you delete the copy and carry on. Below is how to create a free WordPress staging site, which of three methods fits you best, and where people usually slip up.
Table of Contents
- What is a staging site, anyway?
- Do you need one for every change?
- How to Create a Free WordPress Staging Site: Your Options
- Option 1: Check your host first
- Option 2: Use a plugin
- Option 3: Build it on your own computer
- Hide it from Google
- Test it like a visitor
- Getting the changes onto your live site
- Things that go wrong
- Mistakes worth avoiding
- FAQs
- Wrapping up
What Is a Staging Site, Anyway?
A copy of your site, sitting somewhere nobody can see. Same theme, same plugins, same posts. The difference is that whatever you break there stays there.
I like the dress rehearsal comparison. You run through the risky bit first, watch what happens, and only then do it for real in front of the audience. If the rehearsal is a disaster, nobody knows.
Do You Need One for Every Change?
No. That would be exhausting.
Fixing a typo? Do it live. Renaming a menu item? Same. Nobody needs a rehearsal for that.
But a few jobs are different. Big plugin updates. A WordPress core update on a busy site. Anything that touches functions.php or adds custom code. Switching your theme. Messing with a checkout page or a contact form. Bulk changes in the database.
My rough rule: would a mistake be visible to visitors, or take real effort to undo? Then use staging. If not, don’t bother.
How to Create a Free WordPress Staging Site: Your Options
There are three realistic ways, and all of them cost nothing.
Your host may already give you a staging button. A free plugin can clone your site into a subfolder or subdomain. Or you can build a copy on your own laptop. None of them is perfect, and I’ll tell you where each one falls short.
Option 1: Check Your Host First
This is the easiest, so look here before anything else. A lot of hosting plans have one-click staging. You press a button, the host copies your site to a staging address, and later you can often push changes back with another click.
The best thing about it? Staging lives on the same server as your real site, so it behaves much more like the real thing. Something that works on a different server may not work on yours, and that’s a nasty surprise.
The catch is that it all depends on your host and your plan. Some include it. Some hide it behind a pricier tier. Open your hosting panel and hunt for words like “Staging,” “Clone” or “Dev site.” If you find it, use it, and read your host’s help page for the exact steps.
Option 2: Use a Plugin
No button at your host? Then a plugin can do it. WP Staging is one of the best known, and the free version builds you a staging copy.
First, take a fresh backup of your live site. Always, always. Then go to Plugins, Add New, search for WP Staging, install it and activate it.

Open the plugin from your dashboard menu and choose to create a new staging site. Name it (the name becomes part of the address). Check what it’s about to copy, files and database, and start the clone.
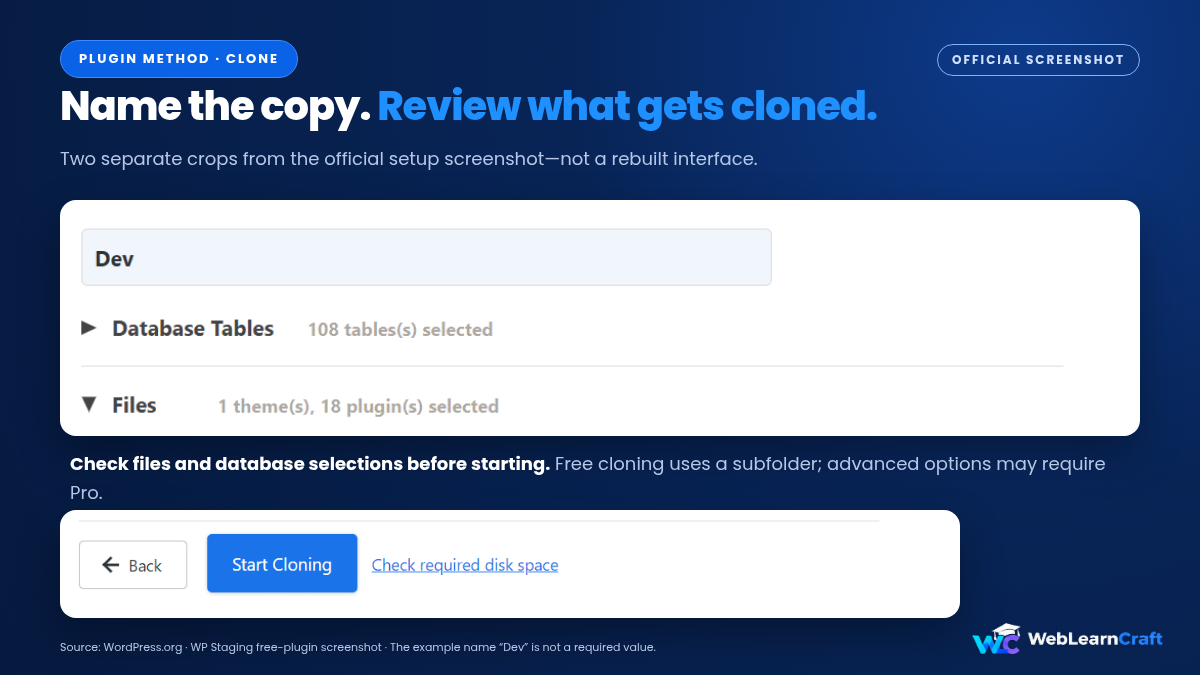
Now you wait. A small site might finish in under a minute. A big one can take quite a while, depending on your host, so keep the tab open and make a tea.
When it’s done, you get a link. Open it, and there’s your copy. In many setups you can log in with your usual admin details.
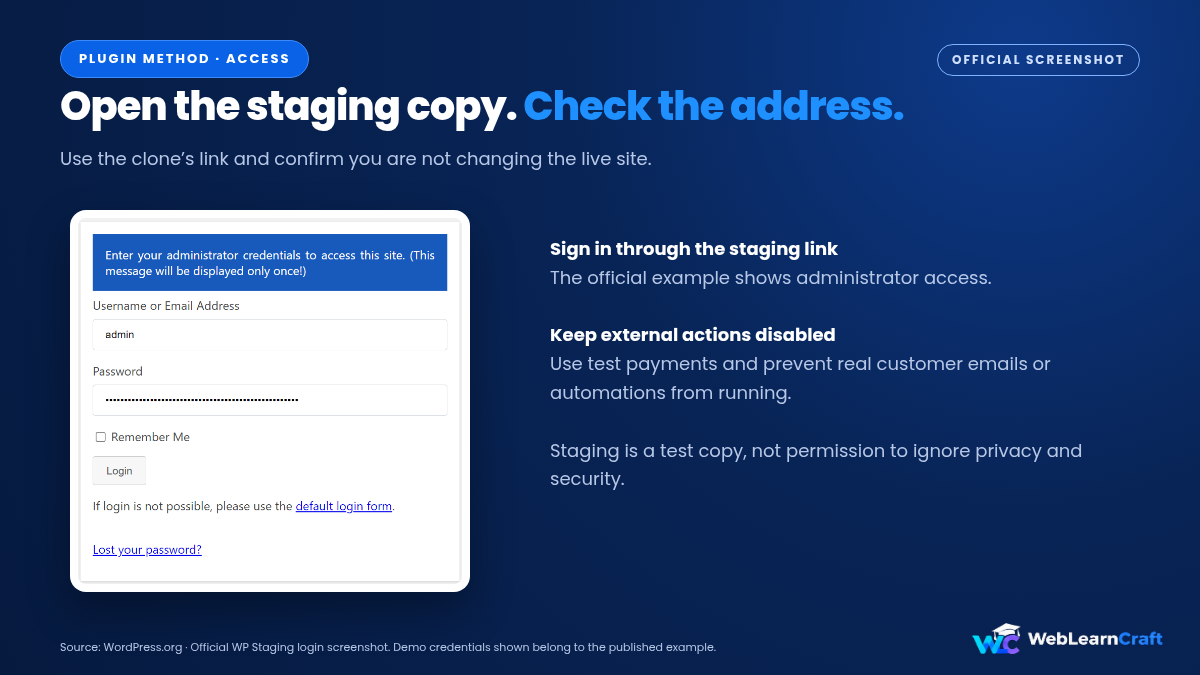
Here’s the honest bit. The free version creates the staging site, but pushing changes back to live is a paid feature. So you test on staging, then repeat the working changes on the live site by hand. For small tweaks, that’s fine. For a big project, it gets old quickly.
Other plugins can help too. All-in-One WP Migration and Duplicator both have free versions that can copy a site somewhere else, but each has a size limit, so check the current number against your site. They aren’t staging tools in the strictest sense, but they can build you a copy.
Option 3: Build It on Your Own Computer
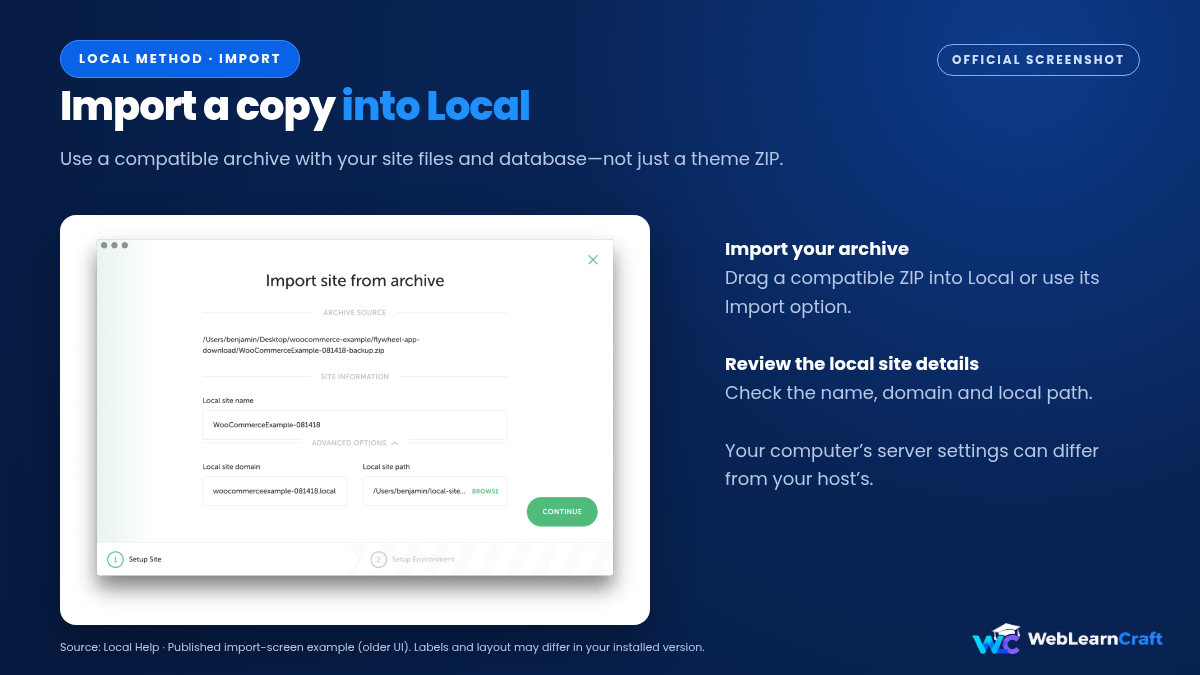
A local staging site lives on your computer, not on the internet. You install a free tool like Local, set up WordPress on your own machine, and import a copy of your site.
What’s great: it’s free, it’s totally private, you can wreck it as often as you like, and it works with no internet at all.
What’s less great: your laptop isn’t your server. PHP versions, settings and speed all differ, so a change that works locally might act differently live. It also needs a bit more setup. If you want to see how a local site connects to a live one, our guide on how to move WordPress from localhost to a live server walks through it.
Hide It From Google
People forget this, and it matters.
A staging site is a duplicate of your content. If Google indexes it, you’ve got two nearly identical sites fighting each other. Not what you want.
So block search engines. On the staging site, go to Settings, then Reading, and tick “Discourage search engines from indexing this site.” Even better, put a password on the whole thing, if your host or plugin offers it.
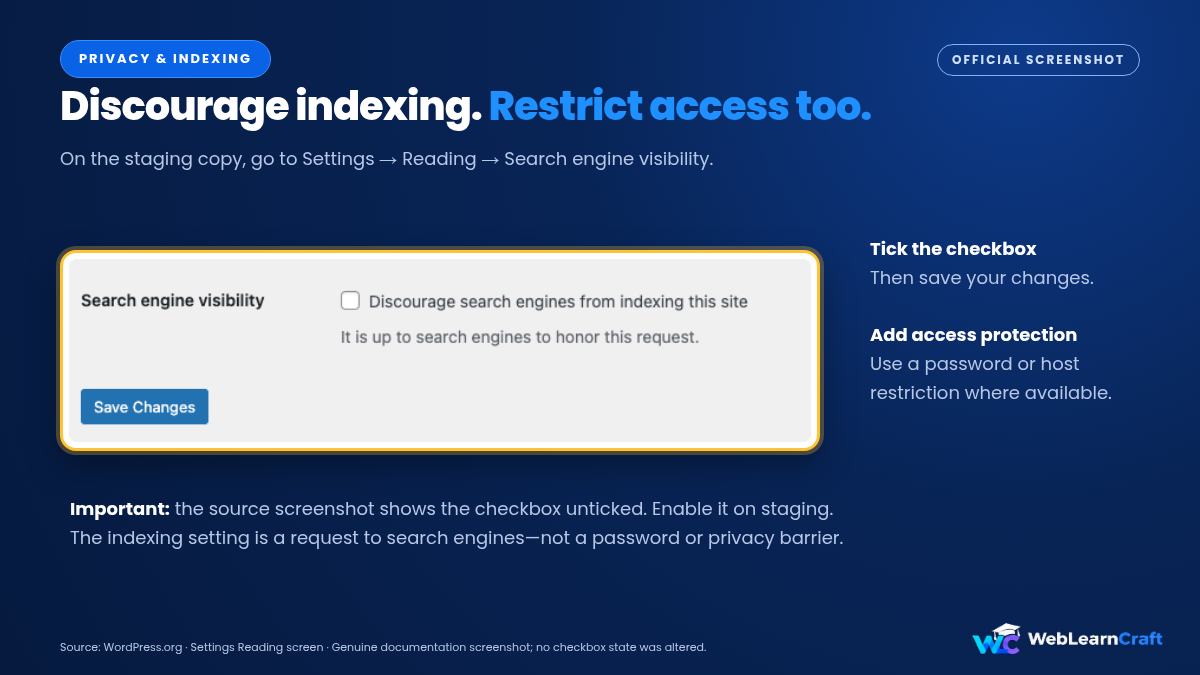
And think about what the copy can do. A cloned site might send real emails, take real payments, or trigger real automations. Switch off anything that talks to customers before you test. If your live site runs analytics, make sure staging visits aren’t muddying your numbers either.
Test It Like a Visitor
Having a staging site isn’t the same as using it well.
Make the change there. Then act like a visitor. Click through your key pages. Fill in your forms. Try the checkout. Look at it on your phone. Open the browser console and check for errors.
One change at a time. Seriously. Update five plugins together and something breaks, and you’ll have no idea which one did it. Update, test, repeat.
Write down what you did. A short list is plenty. You’ll need it when you repeat everything on the live site.
Adding code? Staging is the ideal place to try it first. Our guide on how to add JavaScript to WordPress without a plugin is a good example of a change that deserves a rehearsal.
Getting the Changes Onto Your Live Site
Everything worked on staging. Now what?
For most beginners, the safest plan is the dull one: repeat the same changes on your live site, following your list. Back up first, then apply each change in the order that worked.
Some hosts and paid plugins can push staging to live automatically. Convenient, but careful. If you overwrite your live database, you can lose whatever changed in the meantime, like new comments, orders or form entries. Before you push, check exactly what will be replaced, and choose files only or specific tables whenever you’re given the option.

Once the changes are live, give the real site a quick test, just like you did on staging.
Things That Go Wrong
Don’t panic. The same few problems keep turning up.
Staging looks broken. Images or styles might still point at the live address. Clear your caches. And if you see mixed content warnings, our guide on how to fix a mixed content error shows how to track them down.
The clone fails or stalls. Big sites can hit your host’s time or memory limits. Try again later, leave out big folders you don’t need, or ask your host to raise the limits.
You can’t log in. Staging may use different login cookies. Try a private window, and check the plugin’s help.
Emails behave oddly. Staging is a separate setup, so mail may not work the way it does live. Our guide on WordPress not sending emails explains how WordPress mail works.
Staging and live drift apart. Your live site keeps changing while you test. On long projects, refresh the copy before you start again.
The plugin won’t push to live. In the free version, that’s normal. Pushing needs the paid version, or you do it by hand.
Mistakes Worth Avoiding
- Skipping the backup. Take one before every clone and before every push.
- Leaving staging public. Block search engines or add a password.
- Testing on the live site “just this once.” That’s exactly how white screens happen.
- Letting staging email real customers. Turn off emails and payments first.
- Pushing staging over live without looking. You can wipe out new orders, comments and entries.
- Forgetting old staging sites. They eat space, and an old copy can turn into a security risk.
- Changing ten things at once. Good luck working out what broke.
Frequently Asked Questions
What is a WordPress staging site?
A private copy of your website where you can test updates, code and design changes safely. Nothing you do there affects your live site.
Can I create a staging site for free?
Yes. Use your host’s built-in tool if it has one, a free plugin like WP Staging, or a local copy on your computer.
Does the free version of WP Staging push changes to my live site?
No. The free version creates the staging copy. Pushing changes to live is a paid feature, so in the free version you repeat the changes by hand.
Will a staging site hurt my SEO?
Only if search engines index it. Block it with “Discourage search engines” in Settings, Reading, or protect it with a password.
Do I need staging for every change?
No. Small edits like fixing a typo are fine on the live site. Use staging for updates, code changes, redesigns and anything risky.
Is a local site better than an online staging site?
Local is free and fully private, but your computer differs from your server, so results can vary. A staging site on your own host behaves closer to the real thing.
How do I delete a staging site?
Use the plugin or hosting tool’s delete option. Deleting it doesn’t affect your live site.
Wrapping Up
A staging site is cheap insurance, and most people only wish they’d made one after something breaks. Check whether your host offers one. If not, a free plugin or a local copy will do the job. Back up first, block search engines, test one change at a time, and repeat the working changes on your live site.
Do that, and the dreaded white screen happens somewhere only you can see it. WebLearnCraft publishes clear, beginner-friendly guides on WordPress, SEO and blogging. Browse the latest guides, or contact us if you need help with your site.
One Response