
How to Increase the Maximum Upload File Size in WordPress (All Hosts)
You pick a file, drag it into the Media Library, and WordPress says no. “The uploaded file exceeds the upload_max_filesize directive in php.ini.” Or “exceeds the maximum upload size for this site.” Annoying, especially when the file isn’t even that big.
Here’s the thing most guides gloss over. The limit usually isn’t WordPress. It comes from your server, and the right fix depends on the kind of server you have. That’s why one tutorial works for your friend and does nothing for you. Let’s sort out which method fits your hosting, step by step.
Table of Contents
Check Your Current Limit
Before changing anything, find out what you’re working with.
The quickest way: go to Media, then Add New. Under the upload box you’ll see “Maximum upload file size.” That’s the number WordPress thinks it has.
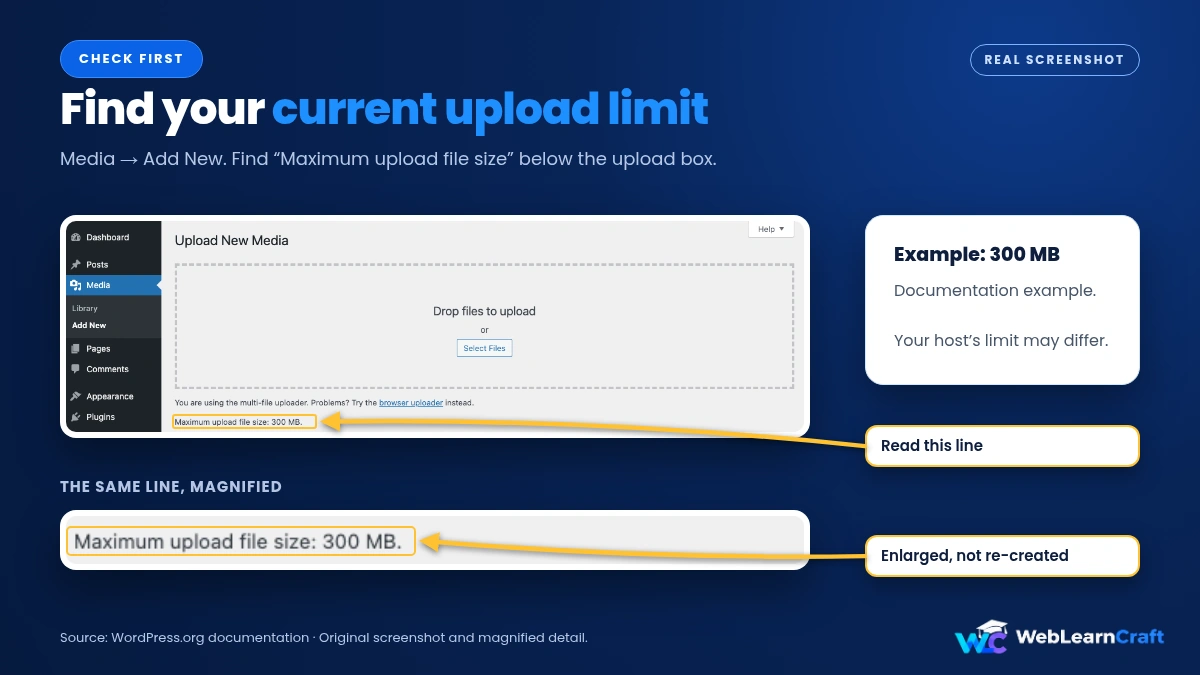
For more detail, open Tools, then Site Health, then Info, and expand the Server section. You’ll find the upload limit and the maximum size of post data there. Jot both down. They matter, and you’ll see why in a moment.

Why the Limit Is So Low
PHP itself defaults to a tiny upload limit. The out-of-the-box value for a single file is 2MB. Many hosts raise it before you ever see it, but plenty keep it low on cheaper plans.
WordPress can’t go above what the server allows. You can’t tell WordPress “allow 200MB” if PHP says 2MB. So every fix is really about changing the server’s settings, and WordPress simply reads them.
Two settings do most of the work. upload_max_filesize is the biggest single file you can upload. post_max_size is the biggest request the server will accept in one go. The second one has to be at least as big as the first. Set a 100MB file limit with a 50MB post limit, and you’ll still hit a wall at 50MB.
Two more can cause trouble with very large files. memory_limit should be comfortably larger than post_max_size. And max_execution_time decides how long a script may run, which matters when a big upload takes a while. For more on what each setting does, the PHP manual explains them in detail.
Method 1: Your Hosting Panel
Start here. It’s the easiest method, and it’s the one least likely to break your site.
Most hosts give you a PHP settings page. In cPanel, look for MultiPHP INI Editor or Select PHP Version. Other panels call it PHP Settings, PHP Configuration or similar. Open it, pick your domain, and find the upload settings.
Change upload_max_filesize and post_max_size. A sensible example is 64M for both, though you can go higher if you need to. Raise memory_limit a little above that if it’s low, and consider a longer max_execution_time for large files. Save, and reload the Media, Add New page to see the new limit.
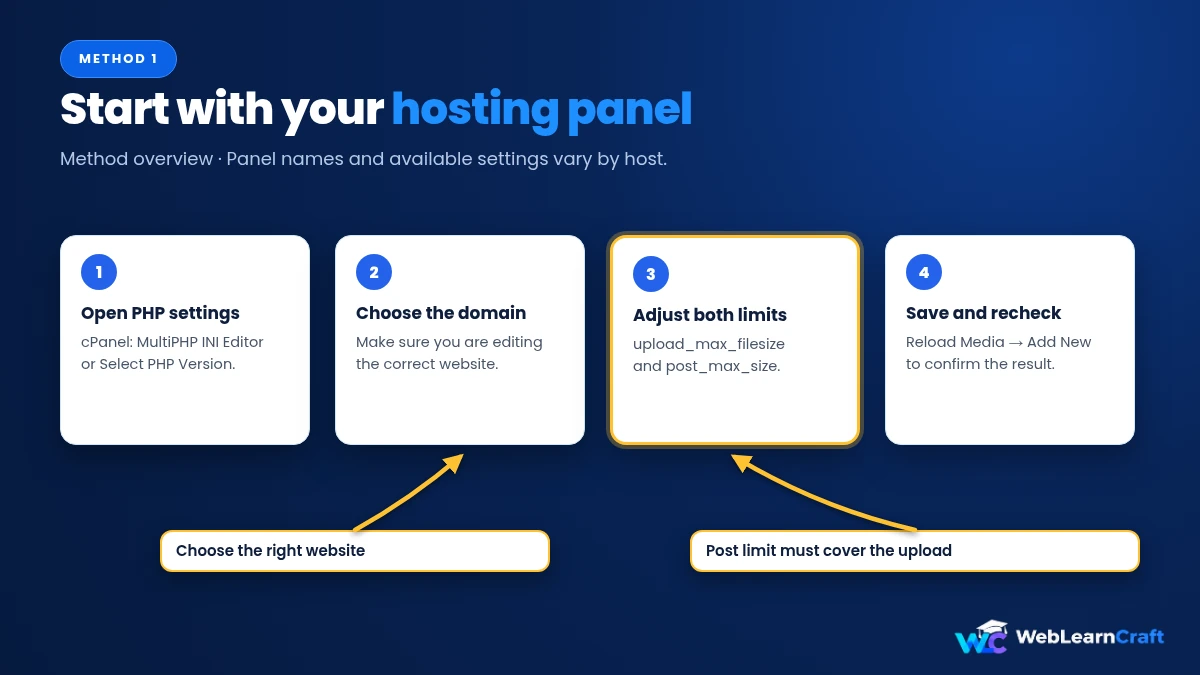
If you can’t find the setting, check your host’s help pages. Some managed hosts don’t expose it at all, and ask you to contact support instead. That’s normal, and it’s often the fastest route.
Method 2: php.ini
If your host lets you edit the PHP configuration file, you can set the values there.
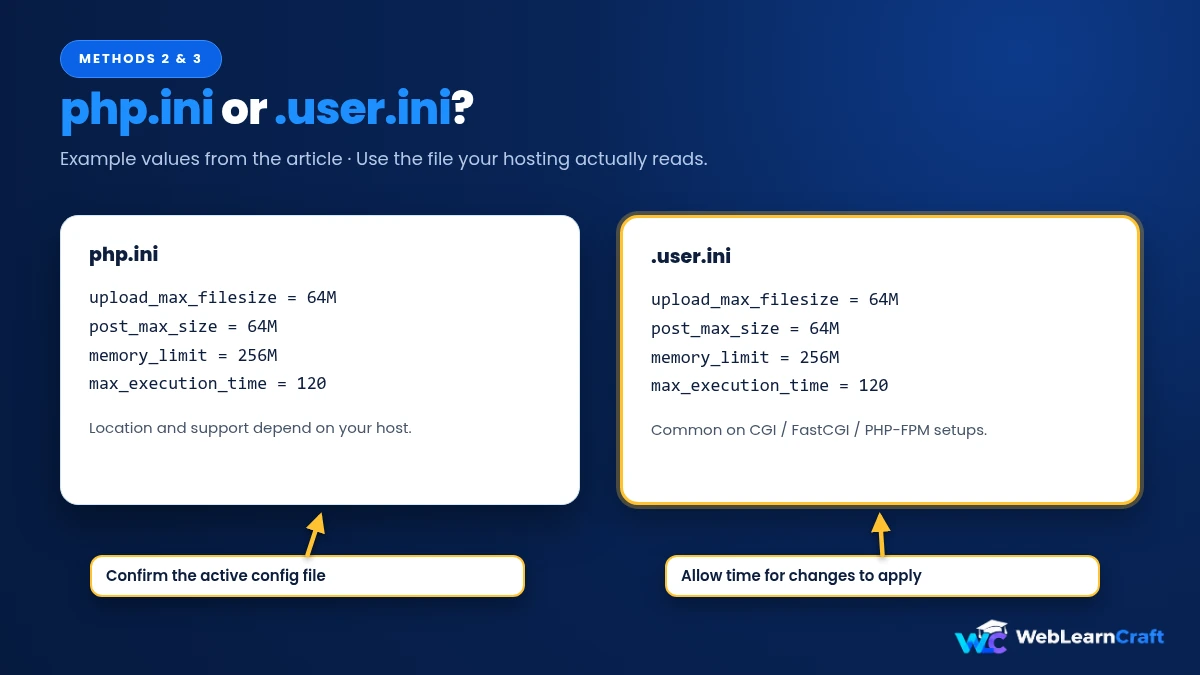
Find a file called php.ini in your site’s root folder, or create one. Your host may keep a custom copy somewhere else, so check their help pages. Then add or change these lines:
upload_max_filesize = 64M
post_max_size = 64M
memory_limit = 256M
max_execution_time = 120
Save the file, and give it a few minutes. On some servers, changes only kick in after PHP restarts or its cache expires. Then check the limit again under Media, Add New.
One thing to remember: on shared hosting, a php.ini in your folder doesn’t always get picked up. If nothing changes, move to the next method.
Method 3: .user.ini
Many modern hosts, especially those running PHP in FastCGI or PHP-FPM mode, read a file called .user.ini instead. It sits in your WordPress root folder, next to wp-config.php.
Create it if it doesn’t exist, and add:
upload_max_filesize = 64M
post_max_size = 64M
memory_limit = 256M
max_execution_time = 120
Same as before, give it a few minutes. PHP rechecks these files on a timer, so the change isn’t always instant. This method is a good one to try if .htaccess gives you an error.
Method 4: .htaccess
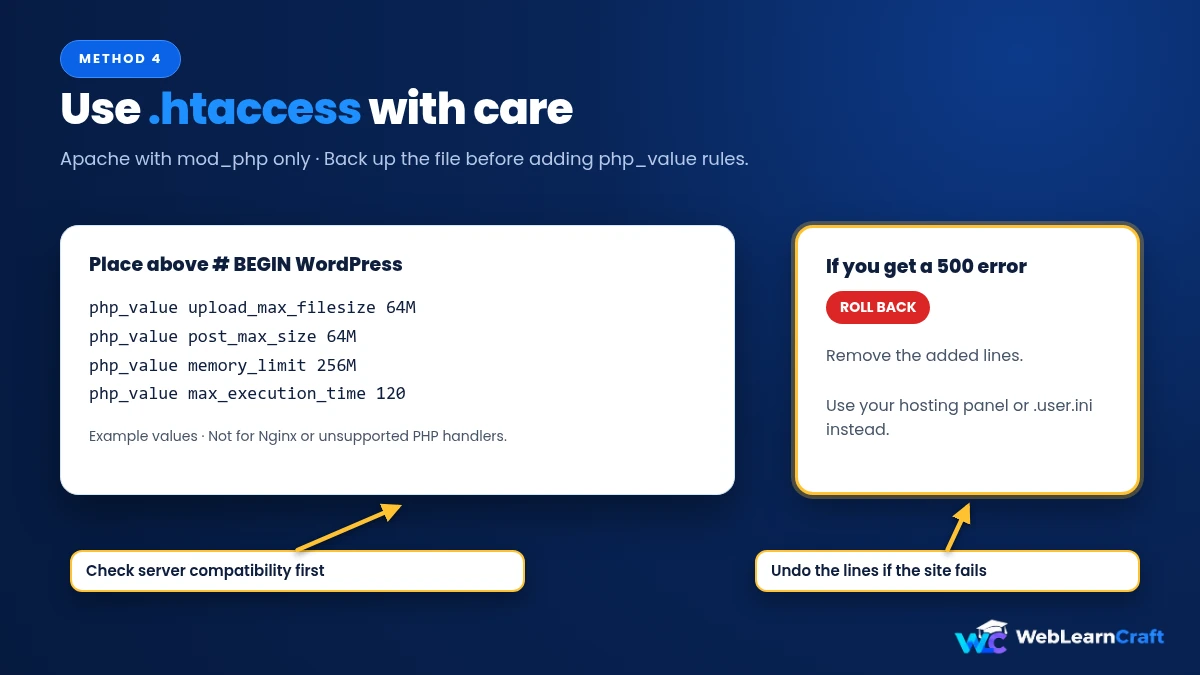
This works only on Apache servers where PHP runs as a module. On other setups it doesn’t just fail quietly. It can take your whole site down with a 500 error.
Back up your .htaccess file first. Then open it and add these lines above the # BEGIN WordPress section:
php_value upload_max_filesize 64M
php_value post_max_size 64M
php_value memory_limit 256M
php_value max_execution_time 120
Save, and reload your site. If it loads normally and the new limit shows up, great. If you see a 500 Internal Server Error, your host doesn’t allow it. Remove the lines you added and your site comes straight back. Then use Method 1 or Method 3 instead.
Editing files by hand is fine, but be careful. If you’re not comfortable with it, our guide on adding JavaScript without a plugin covers the safe habits, like backups and child themes, that apply here too.
Method 5: Nginx
Nginx servers ignore .htaccess completely, so Method 4 will do nothing. Nginx has its own limit, called client_max_body_size, and it defaults to just 1M. That’s even lower than PHP’s default.
You’ll know it’s the culprit when you see “413 Request Entity Too Large” and the error page isn’t a WordPress page at all. It comes straight from Nginx.
The fix goes in your Nginx configuration, inside the server block for your site:
client_max_body_size 64M;Then reload Nginx, and make sure PHP’s own limits are set to the same value or higher, using Method 1, 2 or 3. If you’re on managed hosting, you usually can’t edit this file yourself. Ask your host to raise it.

Method 6: Multisite
WordPress Multisite has its own extra setting, on top of the server’s.
Go to Network Admin, then Settings, and find Max upload file size. Raise it there. Note that this value can’t exceed what your server allows, so change the server settings first using the methods above, then update the network limit. If a network setting is lower than the server, the network one wins.
What Won’t Work
A few popular tips don’t actually do anything, so skip them.
Putting ini_set lines in wp-config.php doesn’t change upload_max_filesize or post_max_size. Those settings can only be changed in the server-level places listed above.
A code snippet that changes the displayed limit in WordPress can make the Media page show a bigger number. But PHP still enforces its own limit, so uploads over it will still fail.
Plugins that promise to raise your limit usually edit .htaccess or .user.ini behind the scenes. They work where those methods work, and fail where they don’t. If one of those plugins fails for you, it’s not broken, it’s just hitting a host restriction.
Still Stuck?
Go through this list.
The limit didn’t change. Wait a few minutes and reload. Make sure you edited the right file for your server type. Clear your caching plugin, and check Site Health again.
You’re getting a 500 error. You added .htaccess lines your server doesn’t allow. Remove them.
You’re getting a 413 error. That’s Nginx. Raise client_max_body_size.
The upload starts, then fails near the end. Raise max_execution_time and memory_limit, and make sure post_max_size is large enough.
WordPress says the file type isn’t allowed. That’s a different problem from file size. WordPress blocks some formats by default, like font files. If you’re trying to upload fonts, see how to add custom fonts to Elementor.
Nothing works. Contact your host and tell them exactly which limit you need. Support teams do this all the time.
If you’re moving a whole site, the backup file is often the one that’s too big. Our guide on how to move WordPress from localhost to a live server shows other ways to transfer big files, like FTP.
Mistakes to Skip
Raising upload_max_filesize but leaving post_max_size smaller. The smaller one wins.
Editing .htaccess without a backup. One typo and the site’s down.
Using .htaccess on Nginx. It’s ignored entirely.
Setting a huge limit “just in case.” Large limits can use up server memory and make abuse easier. Set what you need.
Forgetting Multisite. The network setting can quietly override your changes.
Skipping the wait. Some servers apply changes only after a few minutes.

Frequently Asked Questions
Why is my WordPress upload limit so low?
It’s set by your server’s PHP settings, not by WordPress. PHP’s default is only 2MB, and many cheaper hosting plans keep it low.
How do I increase the upload limit in WordPress?
Change upload_max_filesize and post_max_size through your hosting panel, php.ini, .user.ini, or .htaccess, depending on your server. On Nginx, also raise client_max_body_size.
Which method is best?
Start with your hosting panel. It’s the safest and easiest. Use the file-based methods if your panel doesn’t offer the setting.
Why did .htaccess give me a 500 error?
Your host doesn’t allow php_value lines there, or PHP isn’t running as an Apache module. Remove the lines and use another method.
What does a 413 error mean?
The request was too large for the web server, usually Nginx. Raise client_max_body_size in the Nginx configuration.
Can a plugin increase the upload limit?
Some try, but they work by editing the same files you could edit yourself, and they fail on hosts that block it.
Is a 64MB limit enough?
For most blogs, yes. For large video files, consider hosting them on a video platform instead of uploading them directly.
Final Thoughts
The upload limit in WordPress is really your server’s limit, and the fix depends on your hosting. Start in your hosting panel. If that’s not an option, try php.ini or .user.ini. Use .htaccess only on Apache. Raise client_max_body_size if you’re on Nginx. And remember Multisite’s separate setting.
Raise post_max_size along with upload_max_filesize, give changes a few minutes, and always back up before editing files. If you’re stuck, your host’s support can usually fix it in minutes.